Using CoachPodium, you can easily create a wheel for your coaching business.
Here are the steps to create a wheel:
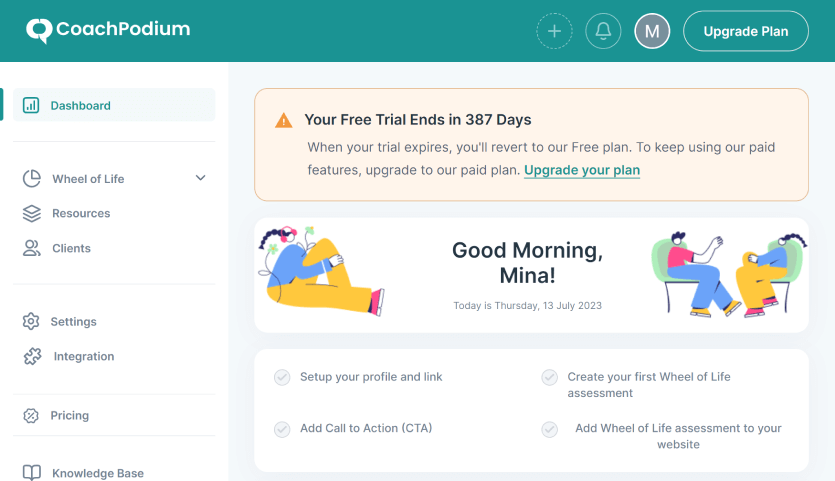
Step 1: Accessing CoachPodium #
- Open your web browser and navigate to the CoachPodium website.
- Log in to your CoachPodium account using your credentials.
- Once logged in, you will be redirected to the CoachPodium dashboard.
Step 2: Creating the Wheel of Life Assessment #
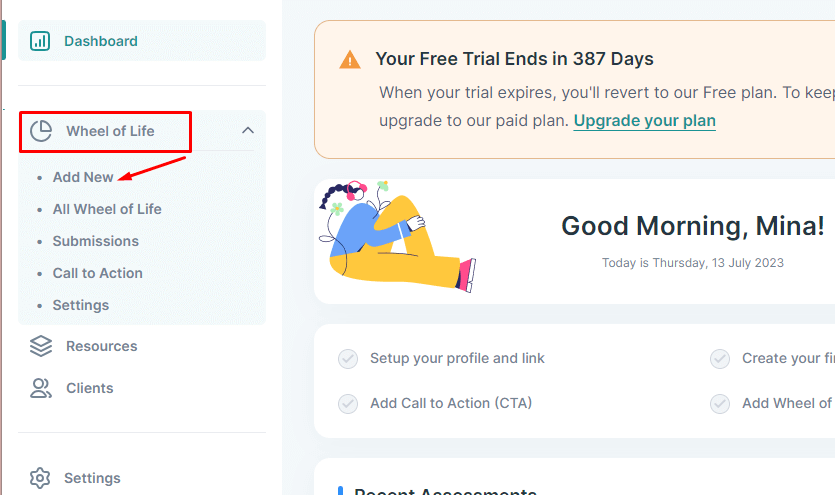
Goto Wheel of Life menu on the left side of the dashboard and click on the Add New button.
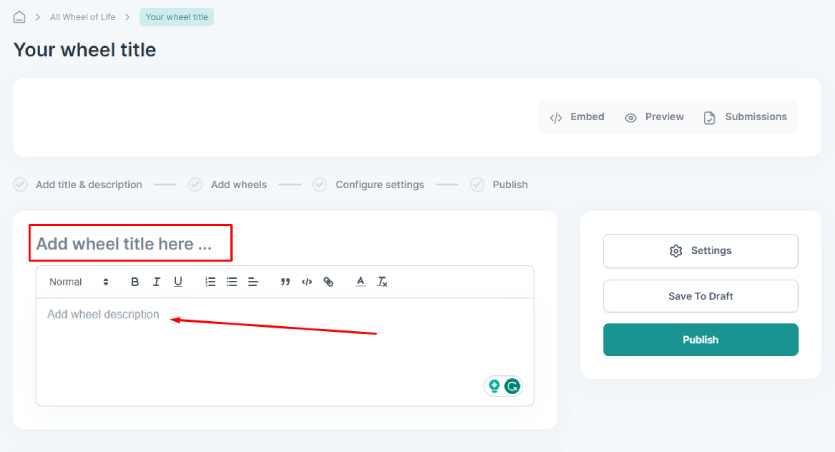
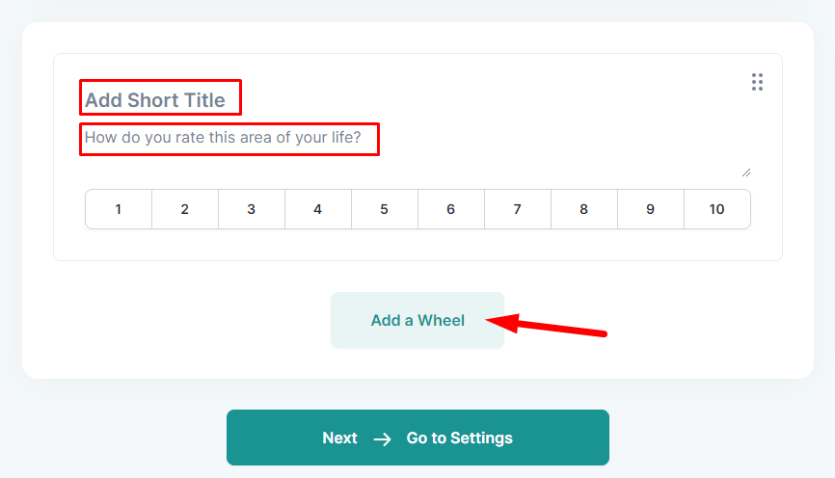
- Add a title for your wheel.
- Then, if you want to describe your title a little more, write a description that reflects the purpose or focus of the assessment. This is not a mandatory step.
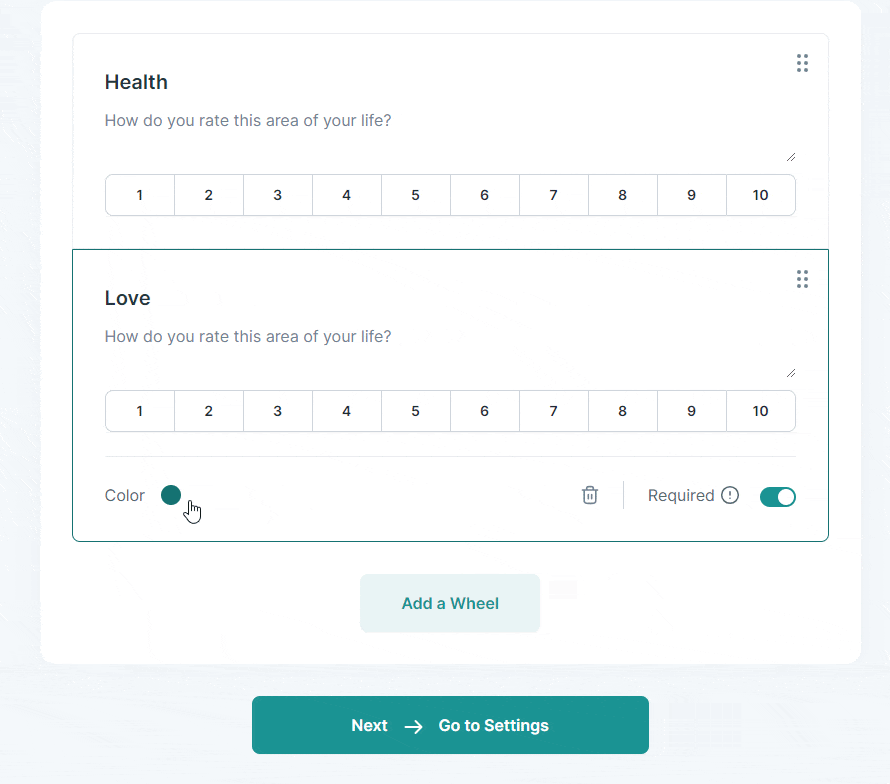
A new Wheel, by default comprises a single block called the Wheel Row.
- Write a title for your wheel row. It can be assessment question from different categories, such as Career, Finances, Health, Relationships, Personal Growth, etc.
- Now, you can elaborate the category by writing a question. Remember this is optional.
- Click on the Add a Wheel button to add more other Wheel Row., and repeat the above step for each category you want to include.
- Once you complete adding all the assessment details, you can click on the Go to Settings button to configure the provided settings for the Wheel.
Step 3: Customizing Each Wheel Row #
Color #
This option allows you to change the color of the header and footer on your assessment page and customize the colors of each section on your wheel chart, providing a unique color for each assessment page.
You can simply choose from the Color options on the section.
Required #
You can check/uncheck the “Required” button.
- Checking this button will not allow your clients to skip test. It means the question is mandatory.
- Unchecking this button will allow your clients to skip test. It means they can skip the question if they don’t want to answer it.
Delete #
If not satisfied with the wheel you have created, you can simply delete it by clicking the “Delete” button.
Step 4: Configuring Wheel #
While configuring settings of your wheel, you will get two options: General and Call to Action Settings.
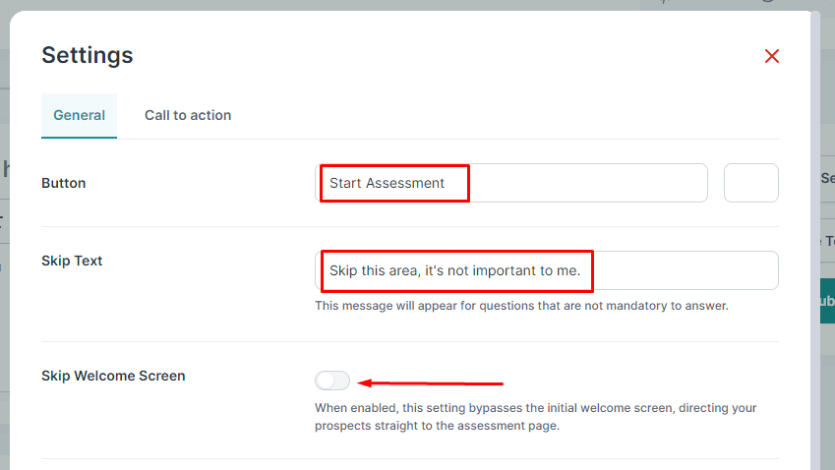
General Settings #
- Button: A Button is where your prospects will click on to take the assessment. You can customize this section and write something that calls for interaction. For example, you can write “Start Assessment.”
- Skip Text: This message will appear for questions that are not mandatory to answer. Clicking on the text will let the users skip the particular page. So, you can customize this text as you desire. For example, you can write “Skip.”
- Skip Welcome Screen: You can enable/disable “Skip Welcome Screen” by simply clicking on the button. If you enable this option, your clients will directly access the assessment page bypassing the initial welcome screen.
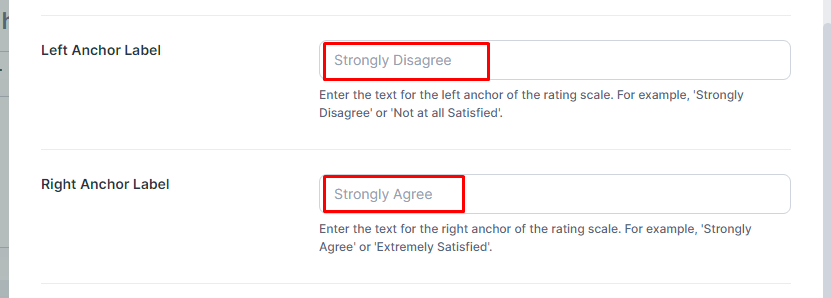
- Left anchor label: Enter the text for the left anchor of the rating scale. For example, you can write ‘Strongly Disagree’ or ‘Not at all Satisfied’ for showing disagreement.
- Right Anchor Label: Enter the text for the right anchor of the rating scale. For example, you can use ‘Strongly Agree’ or ‘Extremely Satisfied’ for showing agreement.
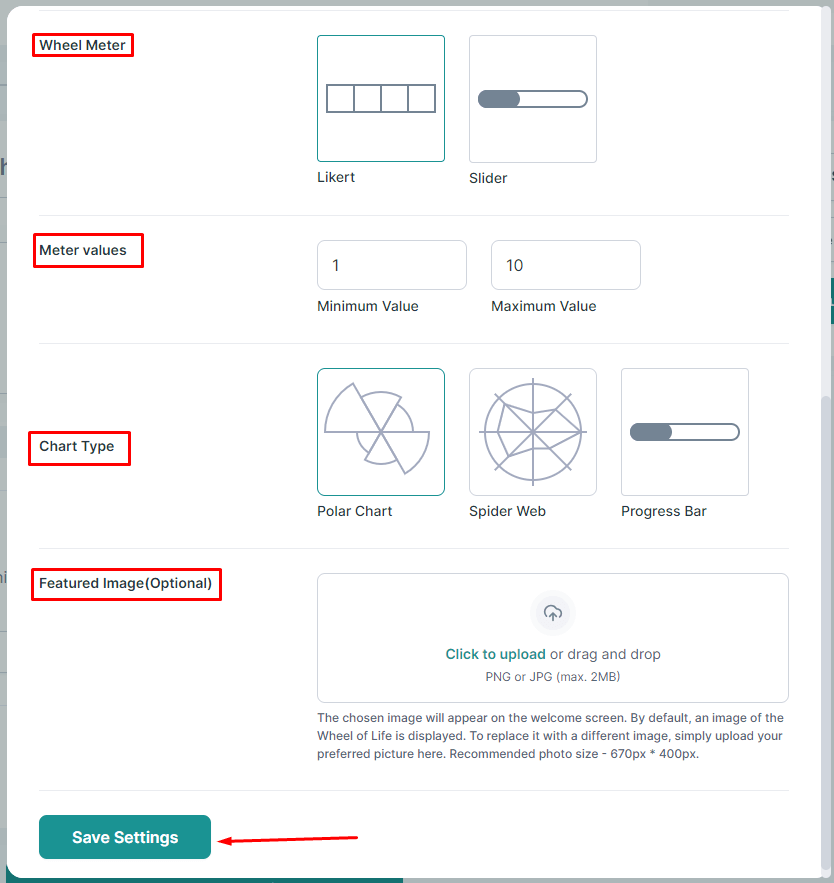
- Wheel Meter: You can choose the type of your Wheel Meter from “Likert” or “Slider” by simply clicking on the option.
- Meter Values: Set the desired values on “Minimum Value” and “Maximum Value.”
- Chart Type: Select a chart type by simply clicking on the chart options. You can choose from Polar chart, Spider web, and Progress Bar.
- Featured Image: This is an optional step. By default, an image of the Wheel of Life is displayed. To replace it with a different image, simply upload your preferred picture here. Recommended photo size – 670px * 400px.
- Now, click Save Settings to save the changes you have made.
Call to Action Settings #
A call to action serves as a clear and concise directive that guides your audience towards a specific action you want them to take.
It can be a simple phrase, button, link, or any other element that stands out and prompts immediate engagement. The primary goal of a CTA is to convert passive observers into active participants.
The CoachPodium offers coaches with three options for setting up Call to Action on their Wheel: Default, Custom, and None.
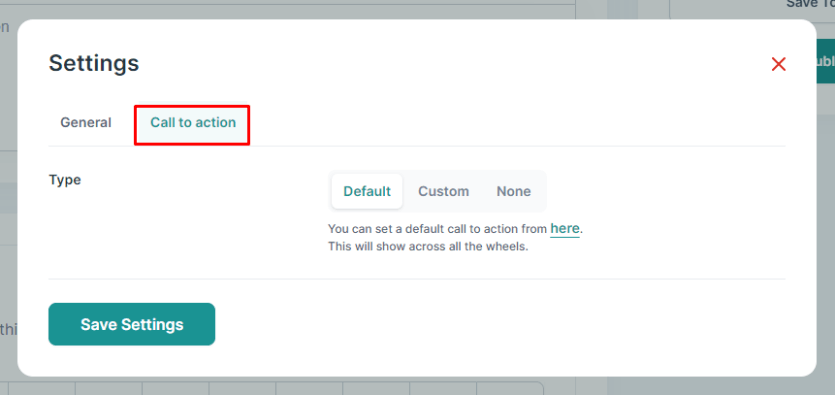
Here is the step-by-step guide to change your Call to Action settings.
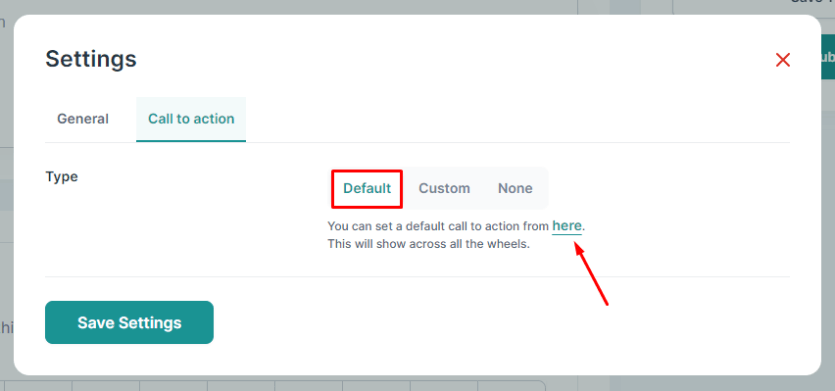
Default #
If you want to display a common/default CTA section for your Wheel, select the Default option. If you prefer to create a unique CTA for each Wheel, choose the Custom option.
To configure the Default setting, you can follow these steps:
Select Default option and click on the link provided to go to further settings.
Now, make following changes.
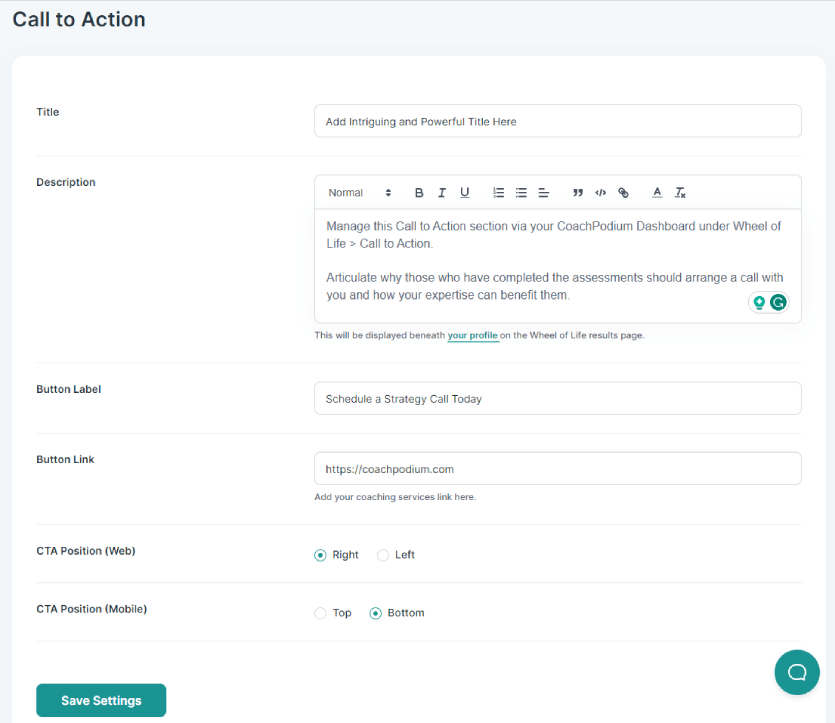
- Title: Write a suitable title. The title should be intriguing and powerful so your visitors want to click on the Call to Action button.
- Description: This section is for a short description of your Wheel. You can simply type the description and let your users see it when they take the assignment.
- Button Label: This label is for call to actions. Write a text that calls for action in the Button label. An example of a button label can be, Contact us Today.
- Button Link: Add the link to your website here.
- CTA Position (Desktop): This option is for the placement of CTA for desktops.
If you want your CTA to appear on the right side of your Wheel of Life assessment page, choose Right.
If you want your CTA to appear on the left side of your Wheel of Life assessment page, choose Left.
- CTA Position (Mobile): This option is for the placement of CTA for mobiles or tablets.
If you want your CTA to appear on top of your Wheel of Life assessment page, choose Top.
If you want your CTA to appear on the bottom of your Wheel of Life assessment page, choose Bottom.
Custom #
Choosing Custom option will let you display a customized CTA section at the end of each assessment.

Follow the following steps for configuration:
- Write a title that describes the purpose of your Wheel on the “Title” section.
- Just like in the default setting, you can write a description for your Wheel title on the Description section.
- You can write a compelling text within the Button label to encourage engagement.
- Now, add the link to your website on the “Button Link” section.
- Now, click on “Save Settings.”
None #
If you don’t want to display any CTA on your wheel, you can simply choose “None.”
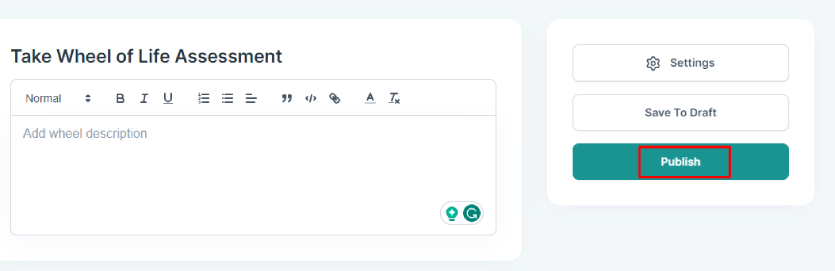
Step 5: Publish Your Wheel #
After configuring all the settings for your Wheel, you will now get the option to publish the wheel.
- You can click on Save To Draft so you can make changes later if required.
If you are satisfied with the wheel you created, you can simply click Publish.
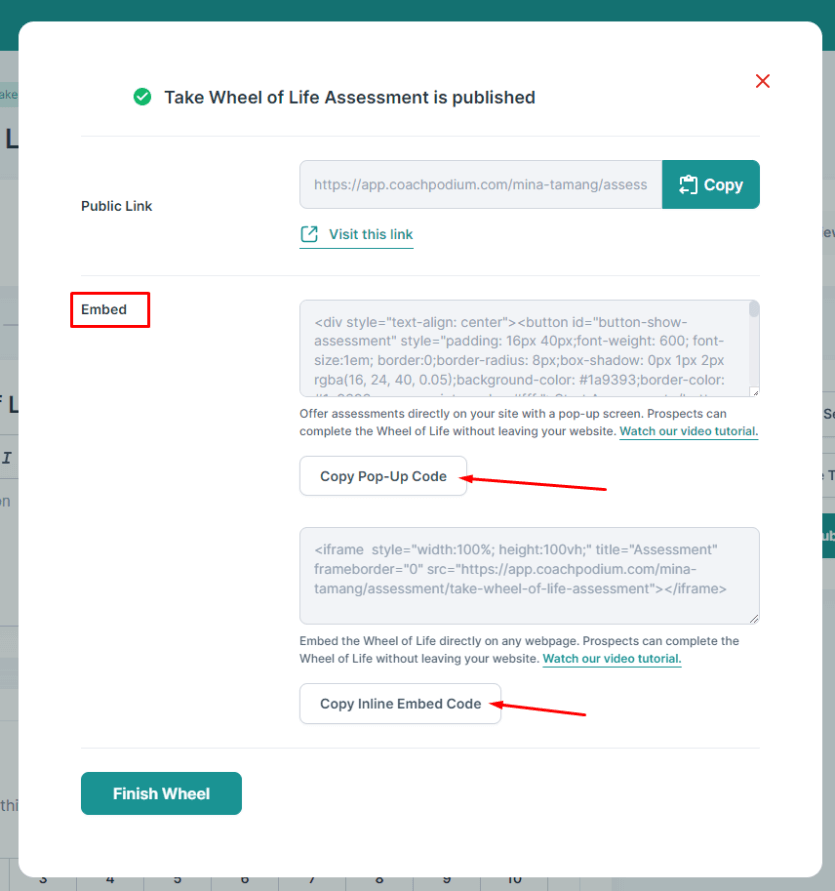
Step 6: Make your Wheel accessible #
For the final step, which is making your Wheel available on your website or to your prospects, you have two options.
Share Link #
A unique URL is generated for each Wheel you create. You can copy this URL to share the assessment across different social networks or communication platforms on the internet.
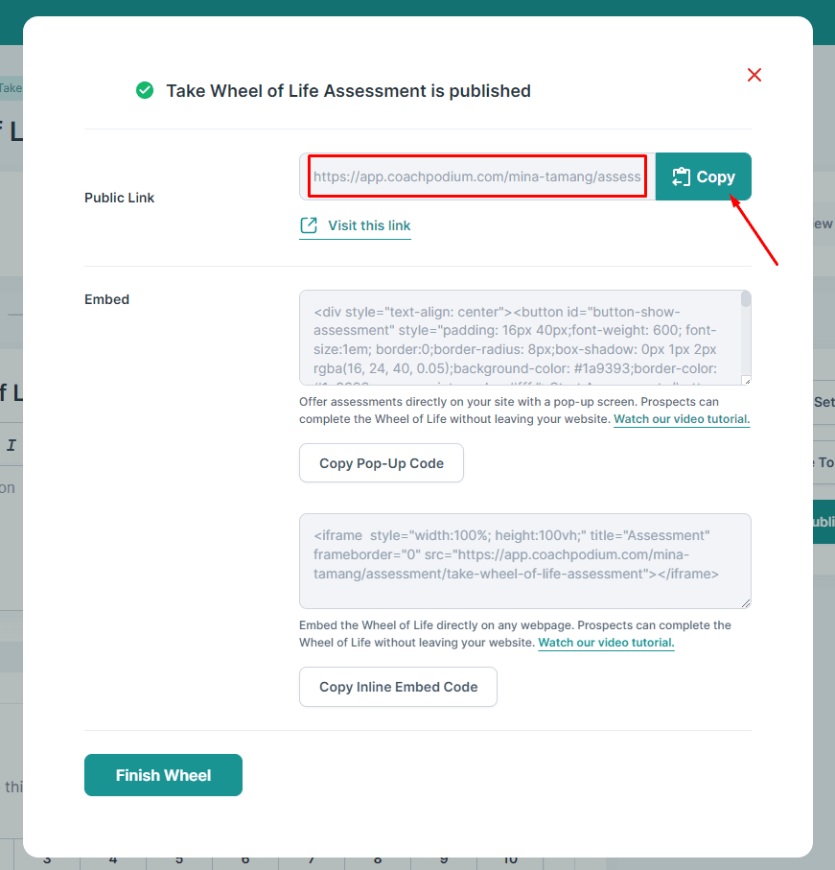
Embed #
The Wheel assessment created can also be embedded in a website. For this you have two options: Popup Code and Inline Embed Code.
- Popup Code: You can display your Wheel directly on your site in the form of a Popup covering full screen width. You can copy the pop-up code and paste it anywhere on your website.
- Inline Embed Code: You can embed the Wheel directly on any webpage, like homepage, service page, blogs, etc . Prospects can complete the Wheel of Life assessment without leaving your website.